In the workflow I am describing, we do not use any ICC profile. We use a csp lut.
We work in 16 bits to have a better range, I would avoid working in 8 bits for matte-painting.
Hope that helps,
Chris
Christophe.
Brilliant usage of CSP LUTs.
Unfortunately there is a fundamental thing in your color pipeline that doesn’t really make it an ACES worfklow at all. but you may be able to tune it in to fit.
When you render files out in an ACES colorimetry, you need to stick with ACES2065-1 (AP0). Files can’t be rendered out in ACEScc/cct/cg. Also, they should be saved in uncompressed OpenEXR files (which Photoshop digests very well btw).
Therefore your workflow might go from rendering out ACES2065-1 EXRs out of NUKE and importing them in Photoshop (which handles ACES2065-1 colorspace gracefully)
As additional suggestion: when setting an ACES pipeline in NUKE, you might find beneficial to have ACEScg as working space (but always save ACES plates in ACES2065-1). Then, Photoshop’s “Edit > Color Settings…” and “Edit > Assign Profile…” parameters allow for specifying an output profile in any output-device colorspace you want.
If this doesn’t work, using a CSP LUT like you did is okay, but the LUT should go from ACES2065-1 to the output device of your choice.
That said, Photoshop is still not a “logoed” product; indeed there may still be some subtelties in using it for an ACES workflow (like color-picking and using color palettes).
3 Likes
Hi everyone,sorry i’m not a technical guy, i’m still not clear how to matte painting in aces then export as texture in 3d application
-
i load an acescg exr to ps and apply the icc profile from alex to the exr, the color match to the nuke
-
what is the step to create mattepainting in aces from scatch ? 8/16bit? and whats the colorspace it should be when it export as texture?
I tried the workflow given by Alex in the OP. Opened the Kodak Test image and applied the .icc profile. I then loaded the same image into Nuke with the ACES1.1 config that I added the AP1 Output color space to (provided by Jed). I have that set as the color space for the read node. The image in Nuke is waaaaay brighter than the one in Photoshop. So clearly my workflow is not quite right. Can someone set me straight?
So sorry for the late reply Walter! I’ll try that next week. Sounds like a very interesting update! Chris
Hey everybody. I found this post on my strive to use ACES in my workflow. For still images I want to use Photoshop for compostiting and thats how I came to this forum.
I am rendering .exr with Maya (Arnold) and don’t know how to implement the OCIO Photoshop Plugin in the comping process. I already use Exr-IO when I load my multilayer .exr files but I don’t know how to handle the different passes with the OCIO Plugin. Is there a way of handling 32Bit .exr passes in Photoshop without going down to 16Bit? I don’t want to merge all my layers and want to keep them as they are.
I tried the conversion of each layer from Input Space ACES - ACEScg to REC.709 like @ChrisBrejon showed earlier in this post but since I don’t have access to the levels adjustment layer in 32Bit, I can’t do much with the gamma correction.
Maybe someone found a way to fully use ACES multilayer-.exr in Photoshop?
Best Regards,
Kyan
2 Likes
Hello Kyan and welcome to the ACES community ! I dont have a single clue on how to work in 32bit in Photoshop… Sorry about that ! Chris
1 Like
I have actually come up with a new sane way to work with ACES in Photoshop in 32bit mode. It’s just been on my “I’ll write up that into a post and release it” back burner for months.
In short, you need a LUT to take you from scene linear ACEScg to display linear ACEScg, then allow photoshop’s regular ICC colour management to take you the rest of the way to the display.
Hey guys I need to write up some proper documentation on this, but if anyone wants to try it out, I think I’ve got something that works pretty well.
This setup differs from the one described in my OP. It’s designed for working on floating point ACEScg files in Photoshop’s 32bit mode directly, rather than 16bit integer mode.
All of the workflows I work within assume you’re working with ACEScg EXR files (AP1), rather than full wide gamut ACES 2065-1 (AP0). I know this isn’t legit by the book ACES, but in my experience it’s extremely common within VFX pipelines. So please take that into account as you read on.
I’ve made some updates to my PureNuke ACES repo.
There is now a new LUT under Luts called:
ACEScg_Photoshop_SceneLinear_to_DisplayLinear_Transform_DimSurround.csp
This LUT is designed to be used on ACEScg images within Photoshop.
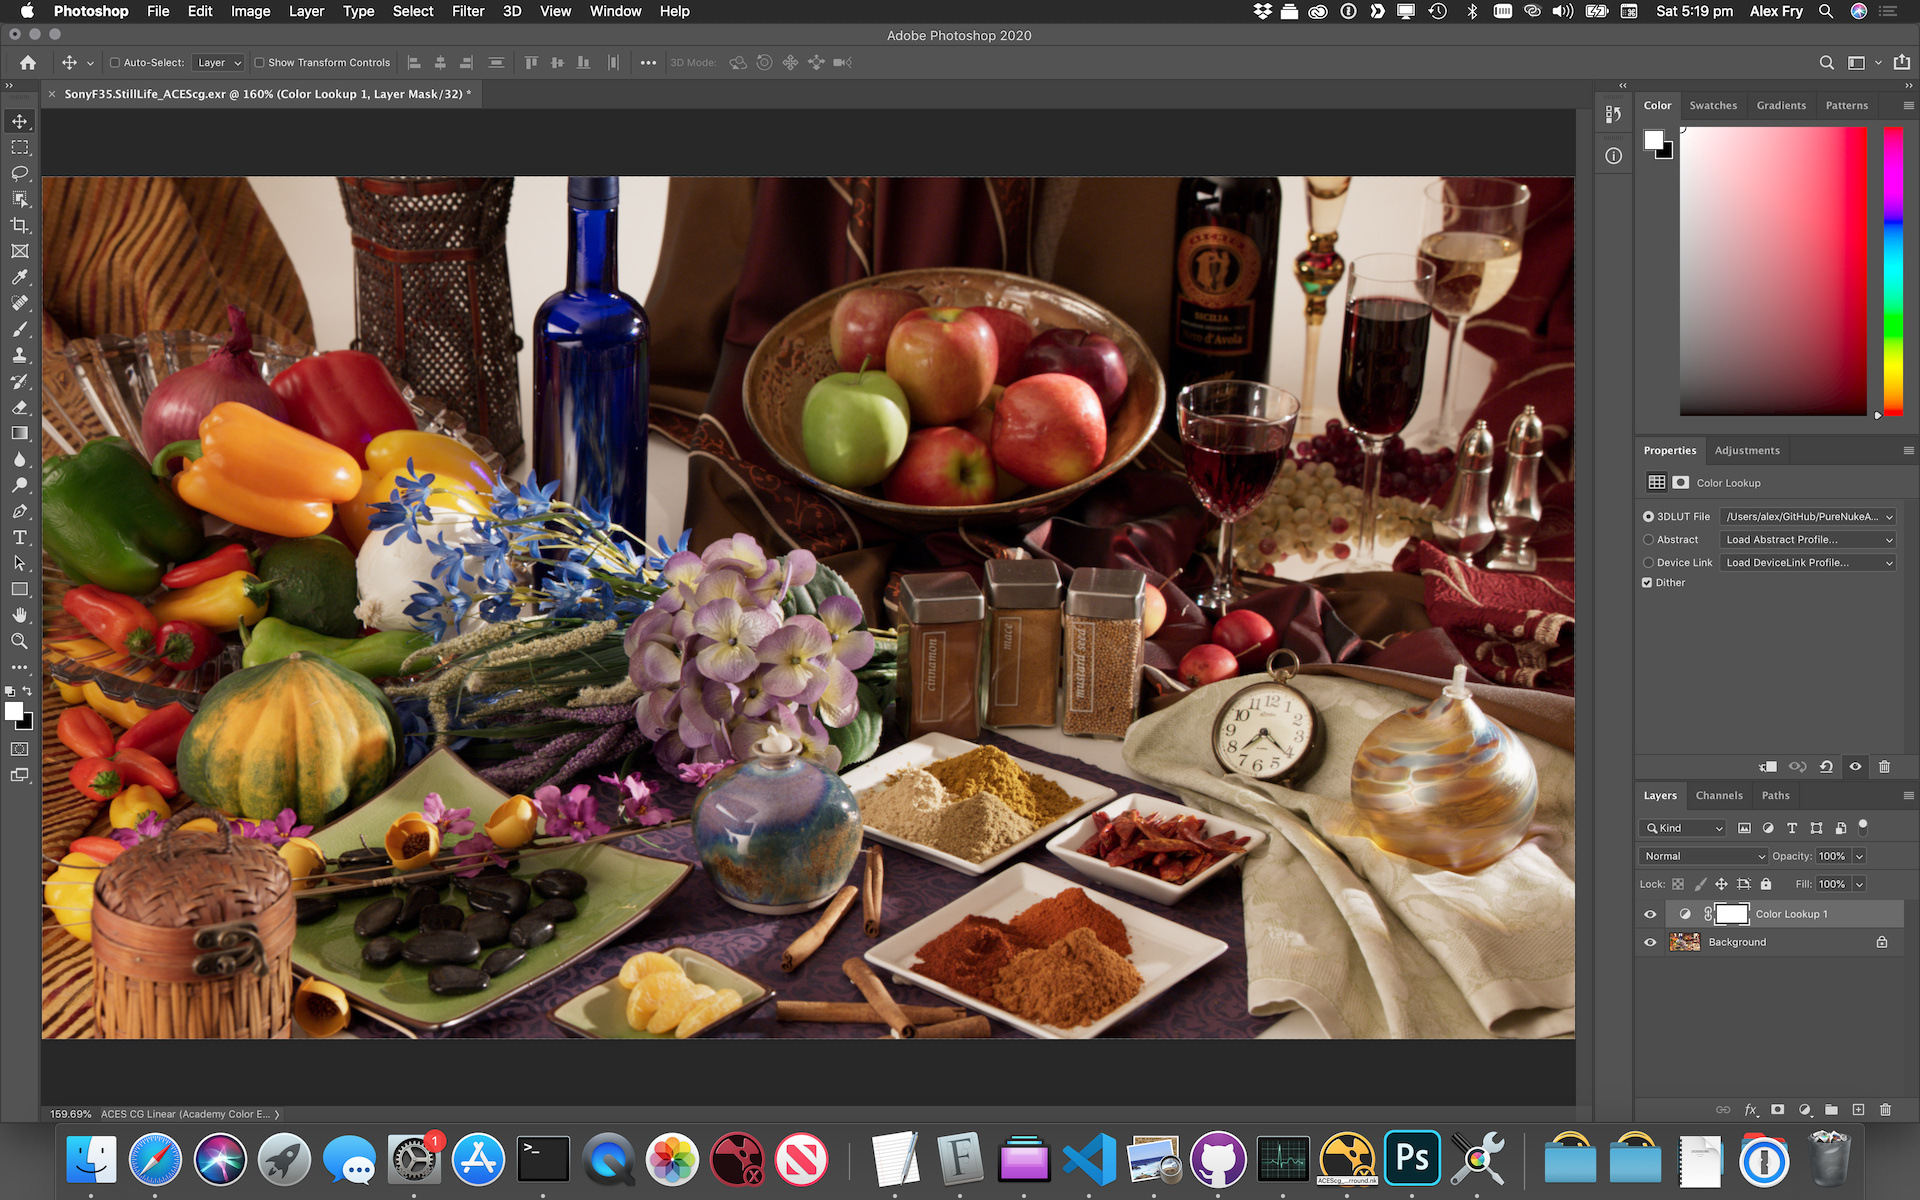
- Open an ACEScg exr in photoshop
- Edit -> Assign Profile -> “ACES CG Linear (Academy Color Encoding System AP1)”
- Layer -> New Adjustment Layer -> Color Lookup -> Load 3D LUT
- Navigate to ACEScg_Photoshop_SceneLinear_to_DisplayLinear_Transform_DimSurround.csp
You should now be viewing your ACEScg file correctly in Photoshop.
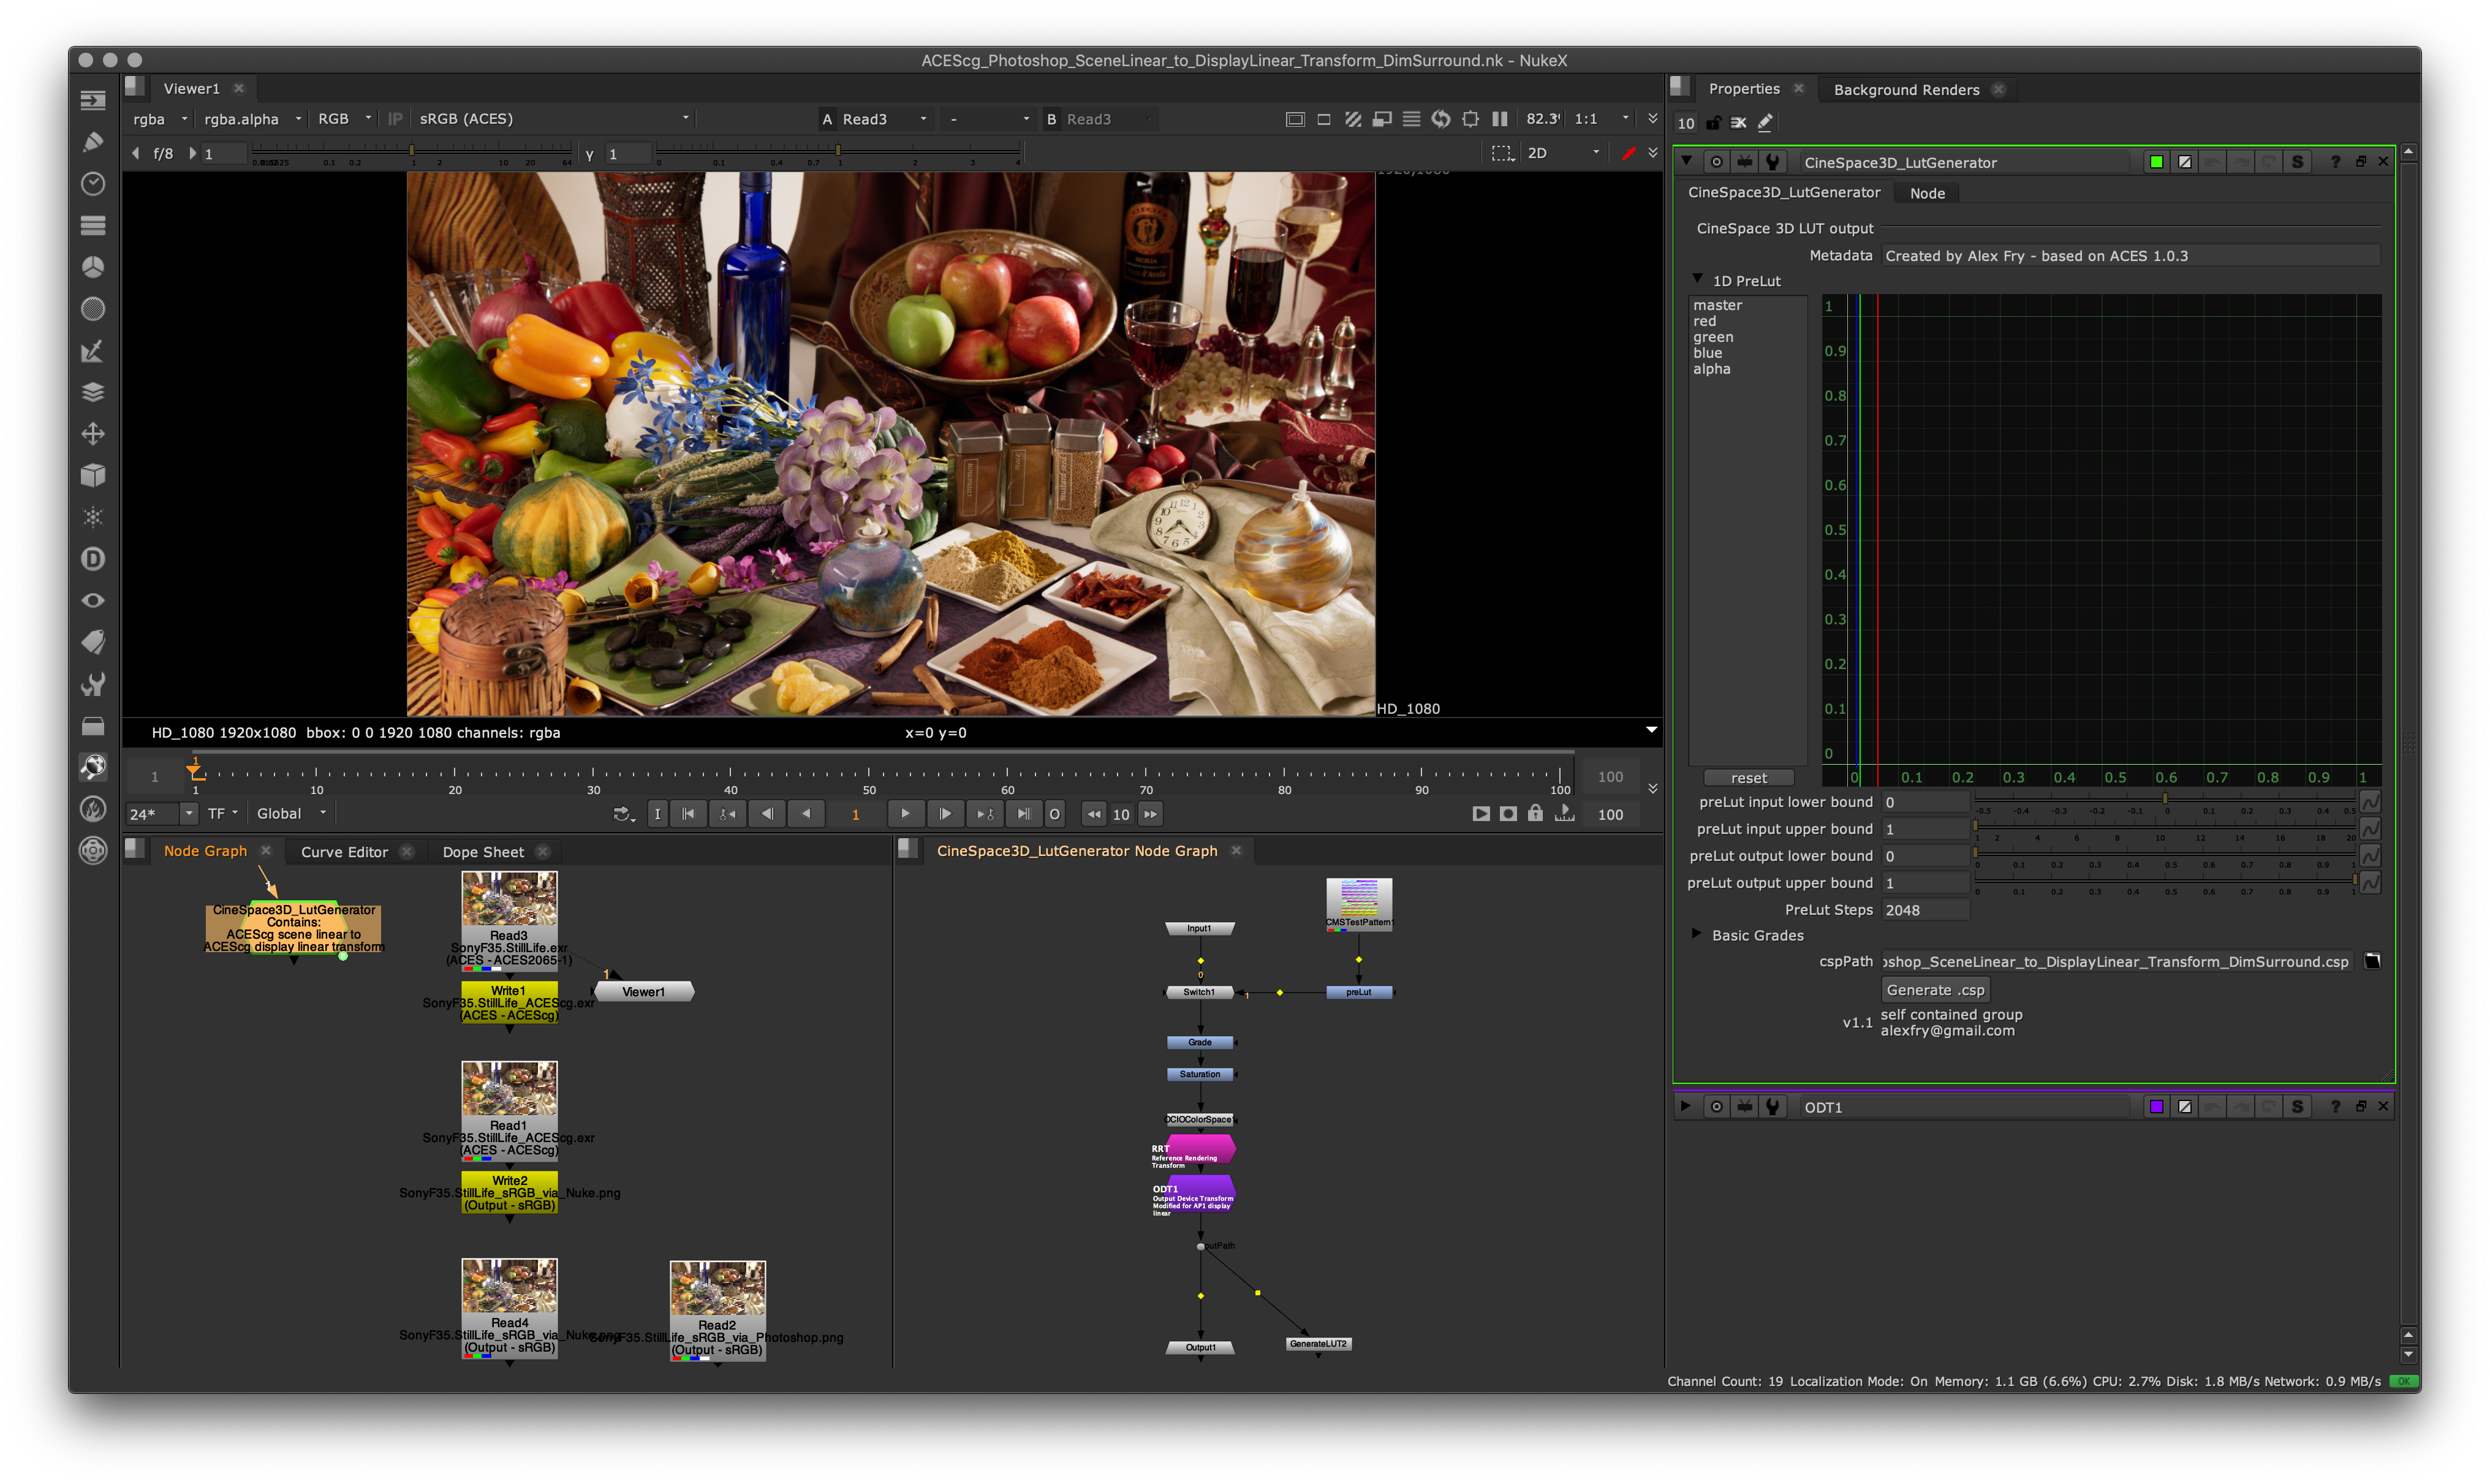
Basically, what’s going on here is the LUT takes the ACEScg scene linear data, and passes it through the RRT, and through most of a standard 48nit ODT, but stops around line 99 after the Dim Surround compensation has been applied.
At this point, you now have display linear AP1 data, all of the picture rendering has been applied, we’re just not transforming for any specific display. Instead we hand off back to Photoshop’s normal ICC based colour management, which deals with transforming from AP1 down to sRGB (or whatever your display primaries are), and applying the EOTF.
You can use this to save out display referred images directly. For example, the file SonyF35.StillLife_sRGB_via_Photoshop.png was exported using the Export -> Quick Export as PNG, and provides a clean match to the same image exported from Nuke using the Output - sRGB.
Or you can do work in Photoshop, then just disable the Color Lookup layer when you’re ready to save out your work as an ACEScg EXR again.
If anyone is interested into digging into the process of how this LUT was created, it’s all contained within the nukescript ACEScg_Photoshop_SceneLinear_to_DisplayLinear_Transform_DimSurround.nk. There is a special modified ODT node inside the CineSpace3D_LutGenerator node.
I’ve tested it on a Mac with Photoshop 2020, and Nuke 12.0v3 against an ACES 1.0.3 config. It may need to be tweaked for other scenarios.
I’ve also changed my working space to ACEScg, but I don’t know if this is 100% necessary.
I’d be interested to hear how this works out for other people.
6 Likes
Hey you guys,
thank You for the warm welcome! I’m very new to this whole ACES thing and coming from a modeling and surface background, I never really played around much with compositing and colorspaces. But this forum helps and I want to dig deeper into that ACES rabbit hole!
Thank You @alexfry for your reply. I will test out your LUT way in Photoshop and will get back here once I have something. I also have a NUKE demo running and think that this helps me to explore the whole topic even more.
Nice work @alexfry!
One thing I found I had to do to get a match was to make sure “Compensate for Scene-referred Profiles” was switched off in the Color Settings. Otherwise Photoshop treats the ACEScg as scene-referred and applies a “system gamma” of about 1.1 to the image. Since your LUT is doing the scene to display conversion, this system gamma is unnecessary, and indeed gives an incorrect result.
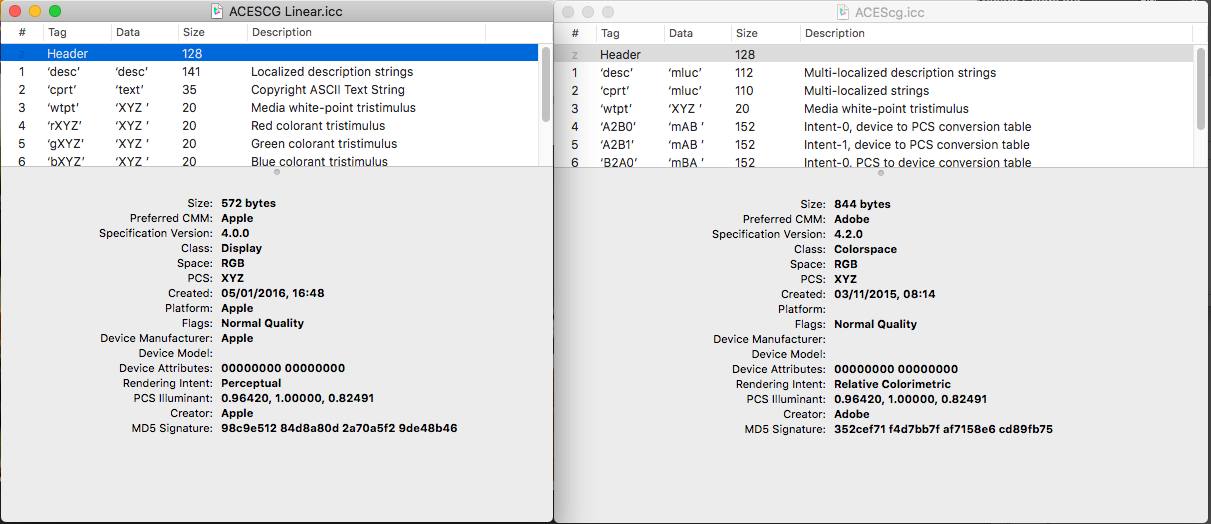
Correction. I appear to have two ACEScg profiles installed on my system, and originally I had the one called “ACEScg ACES Working Space AMPAS S-2014-004” set as the working space. With this selected, the “Compensate for Scene-referred Profiles” check-box changes the image. With the other one called “ACES CG Linear (Academy Colour Encoding System AP1)” as the working space, that check-box has no effect.
Thanks for the rundown, Alex. While 32-bit linear workflows in PS solve the colour science/Nuke interchange side of things, the gotcha I’ve found is matte painters hate it, as it seriously restricts their toolset. As such, it’s been a non-starter, despite the obvious benefits. How did you get the PS users on board with 32-bit mode?
Ha!
I haven’t.
We have 2 sets of photoshop users within the company.
The belligerent ones who insist on staying in 16bit or lower (they have to use the AP1 48nit display referred workflow outlined in my original post).
And the more forward looking ones who are happy to join us in the present in 32bit mode.
Honestly I’m starting to lose sympathy for the first group. It’s 2020, HDR is a real thing, and soon I’m going to have to simply say “sorry, your files are no longer acceptable inputs into the compositing pipeline”. An uncomfortable conversation to be sure, but it’s going to have to happen at some point.
6 Likes
@alexfry thanks for sharing this updated workflow for Photoshop.
I was testing your process in Blender > Photoshop workflow. I used ACES in Blender and images looked as expected with your LUT in Photoshop.
Can I make a request? While I understand the benefits of ACES, right now Blender doesn’t offer the best experience when you force to use it. At the moment Filmic is just more convenient. Would it be possible for you to produce a LUT that works with Filmic based workflow?
I tried to do it myself but the color science gets too complex for me here and I couldn’t make a correct LUT.
Although, I used your LUT and it worked surprisingly well with Blender output of 32bit EXR image. The only thing I had to adjust was to make a tone curve lifting shadows and mid tones to match Filmic look. I understand it’s not very accurate, that’s why I’m asking if you can produce a proper LUT for this workflow.
It would be very helpful while we’re waiting for Blender to implement full support of OCIO and ACES standards. Which should happen relatively soon as I gathered form latest updates.
If not, it’s totally ok. Maybe I’ll eventually be able to figure it out on my own.  Thanks.
Sorry, do you mean make a LUT to match the Blender Filmic look in Photoshop? Or create and ACES LUT for Blender?
Sorry, do you mean make a LUT to match the Blender Filmic look in Photoshop?
Sorry for the confusion Alex. Yes, I meant to make a LUT to match the Blender Filmic look in Photohsop.
@alexfry congrats ! this looks like a proper way to work in Photoshop with ACES. I’ll give that a try hopefully soon (we are in crunch time right now).
1 Like
Hi,
@alexfry
Thank you for starting this discussion and sharing your insights. Very much appreciated!
I am going the log route in Photoshop for years now, but as I never managed to assign a proper ICC profile to the images, I was only able to use Photoshops “Proof Setup” with an baked ICC profile via ociobakelut.
Never felt really good to me, because PS deals with uncommon data and does not even know about it (because it assumed the standard sRGB profile)
Currently we mattepaint in:
AP1 primaries with anAlexaV3LogC transfer function
I would like to switch to a display referred transfer function. Pretty much like Alex’s workflow.
Can anyone here give me some insights on how to create such an ICC profile and how to programmatically assign it to a picture?
Best,
Tobi
1 Like
After doing some tests this was actually more straight forward than I thought it would be.
I did a setup for a mattepainting colorspace with AP1 primaries and an Alexa rec709 1D Lookup Table on top.
For those who are interested.
I created a synthetic ICC profile with DisplayCal. set to ACEScg primaries with sRGB tone curve.
This was working pretty much out of the box.
But Photoshop did the gamut remapping to the displays gamut not in proper linear light, but just in an “sRGB to Linear sandwich”. That’s why I created a mattepainting colorspace with slightly distorted AP1 primaries. This introduces an “error” which gets evened out with PS’s conversion.
from_reference: !<GroupTransform>
  children:
    - !<ColorSpaceTransform> {src: ACES - ACES2065-1, dst: Utility - Linear - sRGB}
    - !<ColorSpaceTransform> {src: ACES - ACES2065-1, dst: Input - ARRI - Curve - V3 LogC (EI800)}
    - !<FileTransform> {src: AlexaV3_K1S1_LogC2Video_EE_1d.cube}
    - !<ColorSpaceTransform> {src: Utility - Curve - sRGB, dst: ACES - ACES2065-1}
    - !<ColorSpaceTransform> {src: Utility - Linear - sRGB, dst: ACES - ACEScg}
    - !<ColorSpaceTransform> {src: ACES - ACES2065-1, dst: Utility - Curve - sRGB}
The result is very accurately matching to Nuke, even though feeling a bit hacky.
Currently I am asssigning the profile with Image Magicks convert tool.
Just my 2 cents.
Best,
Tobi
Hey, reopening the thread cause I have a hard time to figure a matte painting workflow.
So we are using Photoshop to create matte-painting to be integrated in Nuke in an ACES workflow.
We would like the artist to be working in Ps in 8/16 bit mode with a workflow that involve minimal work for him.
Goal is to have something in Ps that looks like what you could see in Nuke through the ODT.
So we could just use "Output-sRGB " as an IDT for the matte-painting but it’s wrong and I think we can find an other solution.
Then i tried to just create a “Utility-sRGB-Texture” to “Output-Rec709” LUT for Ps but with that you can get bright white in 8/16bit mode.
So has anyone find a convenient workflow or has been able to make the Alex’s first method works ?
Cheers.
Liam.