ACES & Photoshop friendly workflows

I wanted to start a bit of discussion about dealing with Photoshop in the context of an ACES pipeline.

A number of workflows I’ve seen/tried revolve around giving Photoshop log data of one flavour or another, and using ICC soft proof profiles, or giving it linear data and using LUT based adjustment layers for viewing (with the additional limitations of working in 32bit mode).

Whilst these work OK, my feeling is that going down that road means you’re fighting the way Photoshop wants to work. Photoshop always seems happiest when it’s working with normalized display referred data that’s managed by the ICC system.

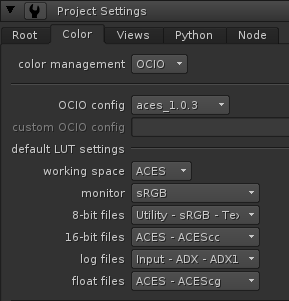
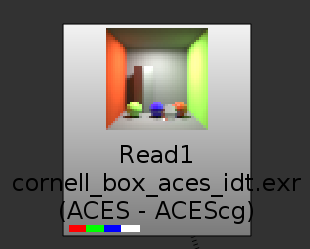
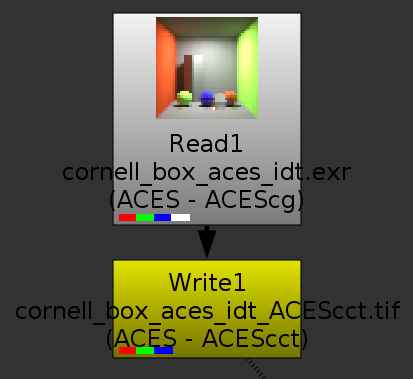
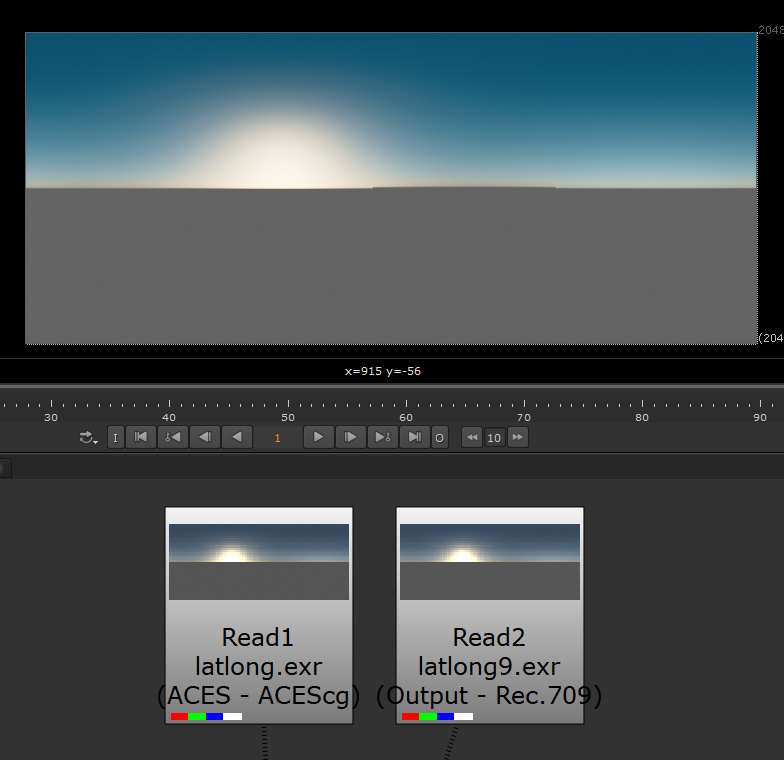
So keeping this in mind, we moved to a setup where we take our ACES data, apply an output transform, work in Photoshop, then invert that transform when we want to move back to the rest of the pipe.

Initally we tried just using P3D60, which is our standard display space, but this causes predictable issues at the edge of the P3 gamut, so we made a custom ODT that targets an imaginary display with AP1 primaries, D60 whitepoint, and a gamma of 2.6. Roughly approximating our display space, but with extra elbow room to protect ACEScg level saturation.

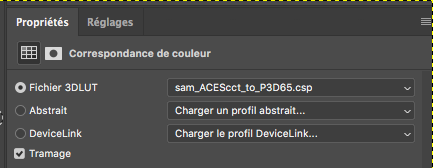
We then created a synthetic ICC profile describing this space, and assigned it to our images.

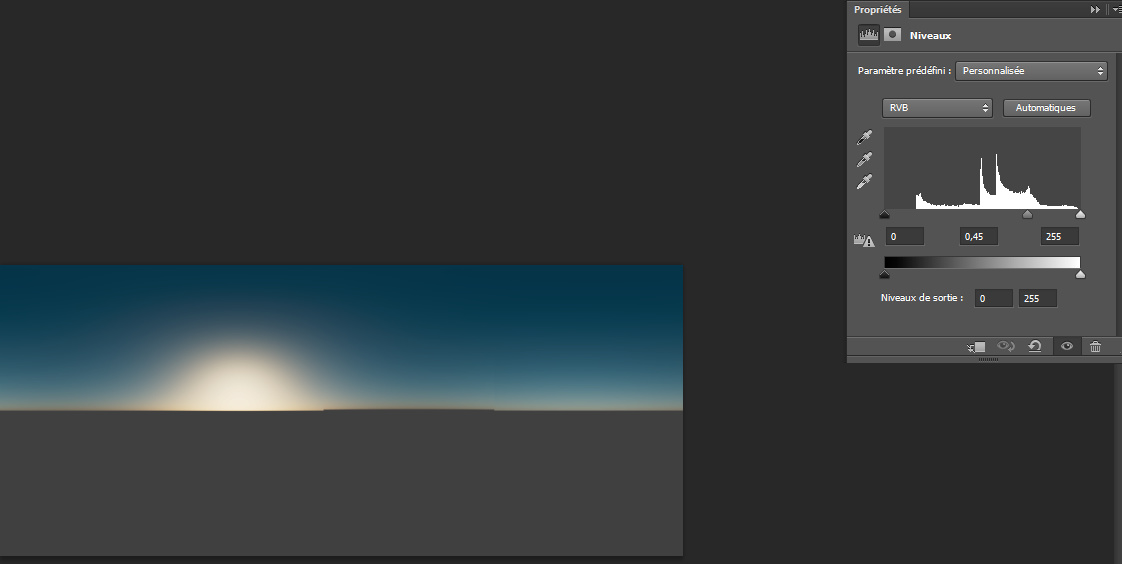
The user can then just open them in Photoshop and work as normal. If they’re going back to EXR land afterward, we have adjustment LUT they can apply before saving out the EXR. Or if they’re going elsewhere (like a marketing delivery) they can just use normal PS colour management to get there (Adobe98 tif for example).

Downsides:
Values above 16.3 in ACEScg are clipped (Good compared to Cineon curve workflows which we’ve used in the past, not as good as ACEScc)
Requires a conversion step coming in and out.

Upsides:
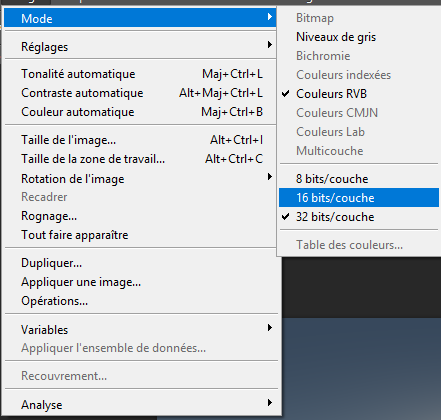
All Photoshop tools available (unlike 32bit mode)
Moving data between other color managed documents and applications works as expected (from the perspective of a Photoshop user)
Normal ICC Colour operations all work as expected (So exporting Adobe98 or sRGB images for marketing works normally)
Colour swatches behave predictably.
Looks normal in other more basic image viewing applications.
Photoshop users actually like it.

Now, there are some bits in here that could go either way.
We based our custom AP1 Display ODT on the dark surround variation, but there is a good case to be made for this to be a dim surround ODT.

Also there isn’t a great story here for HDR, whilst a decent amount of information is packed in, it’s still clipping at 694nits in PQ. I’m not really sure what the move is going to be here until we start getting HDR aware colour management on the PS side.

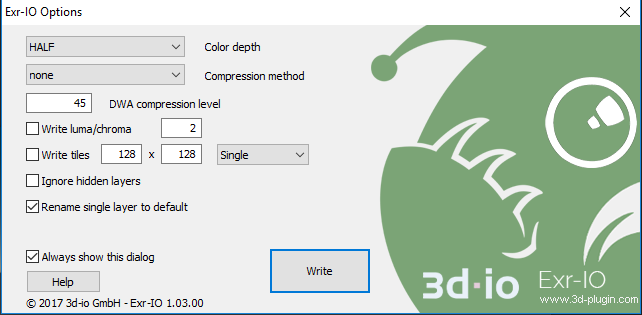
I’ve attached a sample PNG with the described profile attached, the profile on it’s own, and the example CTL transforms (which can be included in an OCIO config bake).

I’d be curious to know if anyone else has gone down a similar road, or other approaches people are currently taking.

Prototype CTL code and ICC profile: http://gofile.me/2SnCA/W4cbmKl1r

2K example image: http://gofile.me/2SnCA/cKzk3KQzv

(Edit: deleted the embedded example image as the ACESCentral CMS was stripping the ICC profile)

5 Likes

Hi Alex,

Have you not tried: OCIO for Photoshop?

I haven’t actually.

But I’ve used the After Effect version, and not had much fun with it. It was slow, and confused the hell ot of our regular AE users.

1 Like

Thanks Alex, I hope this thread can lend some clarity to the workflow.
I was the DMP lead working with Alex during the implementation of this display referred workflow and I must say at first I was extremely nervous. “What about the golden rule about never adjusting the pixels?” I bleated. ‘Baking in’ the transforms seemed heavy handed and…barbaric!
My fears were put to rest however once we got the round trip working and it became obvious there was a 1-1 colour match. The 16 stop limitation was not a problem, giving more than enough perceptual range…any very bright shots could be stopped down in nuke before export and then popped back after the round trip as we would normally anyway.
Photoshop works as if you are working in Srgb, colour swatches are normalised, incoming images can be converted on the fly, images are converted confidently.
The bonus was, the display referred .icc profile, once installed meant that all of my other software could display it as well. I used it to write out from Lightroom, you could view the images as you would any srgb image in Bridge, ACES became invisible.

That being said, having left the security of my former employment, I will be back with some forehead slapping questions as to how to set this up!

The whole thing sounds like an interesting way to do matte painting, etc. I’m not really happy with the ‘log’ approach yet. So having some kind of display refered working space for PS would be nice to test.

Stupid question: how would I ‘convert’ the CTL code to something I could embed into a customized ACES config? I’m not that much into the development side of ACES/OCIO but would really like to test this workflow.

Thanks, Abraham

Hey Abraham

You should be able to add them to the aces ctl directory structure, then bake a new OCIO config using the generation scripts found in the python folders in HP’s github:

I’m curious about this approach, but the downloads do not appear to be working. Are you still working this way? Would it be possible to upload them somewhere else?

Another thought. Have you had any issues with recombining the layers to match what you see in PS? If PS is merging in your custom gamma 2.6 space, how do you get the same results in Nuke merging in linear space?

Hi there, just wanted to share with you an ACES workflow we came with at ENSI school in France.

You will need two plug-ins to make it work:

OCIO for photshop
exr-io

1- In Guerilla, we do an ACEScg render of a skylight. (viewer in REC.709 ACES)

2- Then you import this ACEScg exr linear render in Photoshop:
image
This box will show up if you have installed the plug-in exr-io. Just click ‘open’.

3- The render will show like this, due to srgb icc profile in photoshop.
image

4- Then we apply an ACEScg Ocio profile to the render with the ocio plugin.
image
It will look like this:
image

5- Then we convert the render to 16bits. So ,we can paint and have access to paint tools.
image
The render should not change at all.

6- After this, I will create a ‘levels’ adjustment layer with 0,45 value to undo the srgb icc profile of Photoshop.


The render looks exactly like in Guerilla (except to the slight difference between srgb icc and gamma correction)

7- Then we save the exr file with exr-io.
image

8- Finally we can import it in Nuke as ‘Output - Rec.709’ to make it match the ACEScg exr render originally from Guerilla.

9- You will just need to write as an ACEScg exr to finish the workflow and use the exr as an envlight.

I hope that makes sense and I would be curious to know what you guys think about this setup.

Many thanks,

Chris and Quentin

3 Likes

I may be misunderstanding, but it seems like a rather roundabout way of simply baking in a Rec.709 Output Transform into the image, and then inverting it out when you get back to Nuke.

It’s similar in principle to @alexfry’s method at the start of this thread, but involves more steps, and is potentially more lossy as it uses a standard Output Transform, targeting the narrow Rec.709 gamut, where Alex’s method uses a custom wider gamut OT tailored to the needs of the process. Also, your method requires Photoshop to have two extra plugins installed, but with Alex’s method, once the image has been tagged with the custom ICC profile it can be opened in any copy of Photoshop, or any other ICC aware application.

I hope I don’t sound too negative, and maybe I’ve misunderstood what you are doing.

1 Like

Not at all Nick! Thanks for your comment! :grinning: I have to say I don’t have the technical knowledge to replicate Alex’s workflow. This is why we came this solution as it is less technical (if that makes sense). I have never created a custom ODT nor created a synthetic ICC profile unfortunately… :disappointed_relieved: Thanks for your insight!

Hi Chris

Using your workflow are you not able to have your DMP photoshop artists work directly in 32float linear space instead of 16b? Will it break something?

Meilleurs voeux!

Vincent*


Vincent Thomas (VFX and Art since 1998)
Senior Env artist & Lighting & MattePainter & Creative Concepts
http://fr.linkedin.com/in/vincentthomas

Hi Alex,

Can you please post those files again, it seems like those files are unavailable to download. I am really curious to test this workflow.

Also, I came across thistalk by Marie Fetiveau at ACES where you were also present in the panel. I am wondering whether Rodeo is using the same method? if not, can you please explain the difference.

Thanks,
Rahul

Hello Vincent, I am no Photoshop expert but working in 32 float in Photoshop won’t give you access to many tools apparently. All the best!
Chris

Hi Nick

Look like the Alex ICC profile isn’t available anymore, which look to be the best photoshop’s ACES workflow. Is it still available somewhere and if not why?

  • I’m confused and uncertain what would be also the proper workflow if i pre-bake the conversion into an ACEScg EXR file?

  • Im not that ease in that kind of operation, how could i pre-bake a folder/batch convert a serie of images into ACEScg EXR files?

Cheers everyone for your help

Vince*

Hey

No idea why the link went dead, try this new URL:

2 Likes

Thanks you so much Alex :slight_smile:

I spent an embarrasingly long time trying to get aces to build from the ctl code so I could test this workflow out.

It’s pretty cool and works really well!

I’m uploading the spi3d luts here in case anyone else wants to try them out.

2 Likes

Thanks Jed ! I wanted to post a bit more about the log workflow Alex mentioned in his first post. I understand it is not as Photoshop friendly as an ICC profile but I know it would be helpful to some artists and students. We will start this workflow in Nuke and then move to Photoshop.

  1. First, we will set Nuke in ACES.
    image

  2. Let’s read an ACEScg render in Nuke.
    image

  3. Let’s write it as a 16 bits tiff in ACEScct. (It could be ACEScc, based on your preferences. Have a look at this post if you want to know more on the topic)
    image
    image

  4. We can read our output to make sure it matches our render.

  5. We can now open this tif file in Photoshop. I recommend a recent version of Photoshop like CC because we had some issues with CS6. The image looks grayish wich is normal since its transfer function is now logarithmic.

  6. We can now create a Colour Lookup Layer in Photoshop to load a csp file for display. This csp file needs to be set on your Display Transform. In our case, it is P3D65 (ACES). But it could be Rec. 709 (ACES) or sRGB (ACES) for example.
    image

  7. Thanks to the csp file the tif now matches what we had in Nuke but within a 0-1 range which is perfect to paint in Photoshop.

  8. You can save a 16bit tif from Photoshop after disabling the Colour Lookup Layer and go back to Nuke.

I know it is not a perfect workflow but I think it is an easy workaround for artists who are not familiar with ICC profiles like myself. :wink:

Thanks !

1 Like

So, for the artist they just load this icc file and do everything else like usual?

Our artist do mattepainting and drawing in 8bit mode and then export as texture